Pages

Tampilkan postingan dengan label power. Tampilkan semua postingan

Senin, 30 Mei 2016

NASA Spaceship And Mission Control Desk

Spaceship in bedroom
You have to watch this video of a homemade NASA spaceship and Mission Control desk, part of which is controlled by an Arduino.

The above video is featured in the June 26 "Making Fun: Kid’s Room Spacecraft" post on the Make magazine website. The Mission Control desk featured in the above video and Make post was highlighted in a February 19 Make post, "Making Fun: Mission Control Desk," and was explained in this video. If you liked the video and are interested in details of how Jeff built some of the parts, make sure to read the two posts linked above.

After watching that spaceship video, I was both inspired and embarrassed. Inspired by the awesome job Jeff Highsmith did of building the Mission Control desk for his sons, then later building a NASA spaceship thats linked to the Mission Control desk.
Control panel in spaceship

As someone interested in learning about microcontrollers (MCUs) and about building things with MCUs, I was very much inspired by the variety of switches, lights, controls and realistic panels on the amazing desk and spaceship that Jeff built for his sons. As an engineer I was also inspired when he said in the video, "I put in an iPhone dock for future expansion. For now it will just play video from NASA, but in the future I plan to have some homemade satellites to monitor." I dont know if he meant homemade satellites that hang from the ceiling of his sons room, or if he is figuring that in a few years, there will be civilian satellites and he plans to have one or several of those civilian satellites be his. Either way Im sure his expanded system will be cool, and his sons will have a great time with
Mission Control desk
the desk, the spaceship, the satellites and other additions Jeff and the boys make to their private space program. Can you imagine how much those two boys are going to know about electronics and building stuff by the time they reach high school!

Now to the embarrassing aspect of the Highsmith Space Program. Im a bit embarrassed I never made anything half as cool as that for my kids. Im also a bit embarrassed that the Humboldt Microcontrollers Group hasnt come up with a really unique and interesting project that four or more people want to put a bunch of knowledge and skill into that will make people who see it say, "Whoa, thats really awesome!"

There are a couple things that I want to do a little differently as a result of watching Jeff Highsmiths videos and reading his Make magazine posts about the Mission Control desk and the spaceship.
Payload bay remote camera monitor

The first thing to do differently with MCU projects is to think big while paying attention to details. Jeff appears to have had a big picture idea of what he wanted for his sons -- starting with a homework desk that can convert into a NASA Mission Control desk, then extending the space theme to his other sons bedroom with a spaceship. But what makes the desk and spaceship fantastic accomplishments is the close attention to the details. The control panels have complex and extremely realistic looking labels, switches, lights and controls. To make the experience authentic for his kids, Jeff incorporated recordings from NASA and simulations of actual astronaut problems. I realize the only way to tackle a large project is to break it down into small steps, but you have to have a good picture of what the large project will look like, and you have to pay attention to the small steps. When you know the big picture, and youre taking care of details, then commitment and perseverance have to kick in.

Mission status light panel
So, for the Humboldt Laser Harp and the Electronic Light Orchestra, the Humboldt Microcontrollers Group should discuss, agree on and document what the big picture is. How much time and effort do people want to put into that project. Next we should get more specific, more detailed on the finer points of what wed like the Humboldt Laser Harp to look like and to do from both a music and a lighting standpoint.

The second thing to do differently on MCU projects is taking more photos and videos at each stage of a project, planning ahead of time the shots to capture for each project. Jeffs videos have excellent documentation of building the desk and spaceship. I became less embarrassed but no less inspired when I read that Jeff is a full-time videographer. That explains thinking things out enough ahead of time that he captured cool construction sequences while he was building the projects. It would be really good if the Humboldt MCU group could find a videographer or two who are interested in MCUs and electronics and would like to participate in the groups activities. They would know how to capture the story of a project, and theyd be able to put together a cohesive and impressive video.
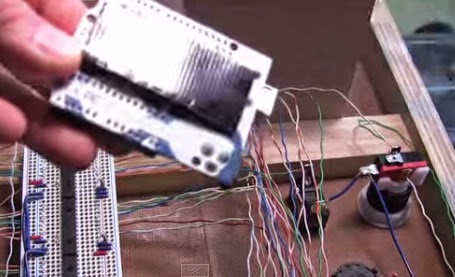
Ardunio used to control instrument panel

I think Ill keep a link to Jeffs spaceship video handy and watch that regularly to keep me inspired and to remind me of how rewarding completion of a big, complex project can be.

**********
Read More..

Minggu, 22 Mei 2016

Ultra Low Power Microcontroller With A Supercapacitor

This post is a follow-up to this blogs FRAM (ferroelectric random-access memory) post in June, and takes a look at a recently-introduced Texas Instruments (TI) FRAM LaunchPad development platform, as well as how to use FRAM effectively in a particular use case.
TI MSP-EXP430FR5969

First the FRAM development platform. It appears from a post on 43oh.com that the MSP430 ULP (ultra low power) FRAM board, MSP-EXP430FR5969, was soft-launched in February 2014, then rolled out with more fanfare and distributor partners in June 2014, per the Australian post, "element14 offers ultra-low power with Texas Instruments LaunchPad dev kit," and a number of other similar new product posts. The Australian post above says,
"Embedded FRAM, a non-volatile memory known for high endurance and high speed write access, together with ultra low power makes the MSP430 development platform suited for a wide variety of applications ranging from metering, wearable electronics, consumer electronics and the Internet of Things (IoT) to industrial and remote sensors, home automation and energy harvesting. The new development kit includes TIs new EnergyTrace++ technology, the worlds first debug system that enables developers to analyse power consumption down to 5nA resolution in real-time for each peripheral...Key features include MSP430 ULP FRAM technology-based 16-bit MSP430FR5969 MCU; 64KB FRAM/ 2KB SRAM; 16-Bit RISC architecture up to 8-MHz FRAM access/ 16MHz system clock speed; 5x Timer Blocks; Analogue: 16Ch 12-Bit differential ADC, 16Ch Comparator; Digital: AES256, CRC, DMA, HW MPY32; 20 pin LaunchPad standard leveraging the BoosterPack ecosystem. Various components including on-board eZ-FET emulation for programming, debugging and energy measurements have been provided in the evaluation kit for a fast start; on-board buttons and LEDs on the board enable quick integration of a simple user interface in addition to a SuperCap allowing standalone applications without an external power supply."
MSP430FR5969 LaunchPad Power Domain Block Diagram
The part that especially interests me is the SuperCap that enables a minimal level of operation without an external power supply (and without a battery?). Enabling MCUs to operate without external power sources was the topic of an earlier post on this blog, "Microcontrollers: Batteries Not Included. Or Needed." That post discussed getting the MCUs power from small energy harvesting devices. It would be nice if a supercapacitor turns out to be another no-batteries-needed option for MCUs. The boards Users Guide shows the power domain block diagram to the left and says, "The board is designed to support five different power scenarios. The board can be powered by eZ-FET or JTAG debugger, external power, BoosterPack power, or standalone super cap power." A bit of online research is needed, it appears, for me to totally understand just how much the MSP-EXP430FR5969 board can do using just the 100 mF capacitor and no external power. If Google and I cant figure that out, Ill check with Ed Smith to get my answer!

If youre interested in the MSP430FR5969 microcontroller (MCU) that powers the above development platform, consider reading the Electronics Weekly article, "Exploring FRAM microcontroller-based design – Texas Instruments." The graphic at the right from that article shows how flexible the memory configurations are in that MCU. Here are a few more resources to help you learn more about the MCU and its platform:
  1. MSP430FRxx MCU overview page on TIs site.
  2. MSP-EXP430FR5969 LaunchPad Evaluation Kit page on TIs site.
  3. Overview of MSP430 Ultra-Low-Power MCUs PDF on TIs site.
  4. MSP-EXP430FR5969 LaunchPad Development Kit Users Guide PDF on TIs site.
  5. 6-part video tutorial on YouTube for the MSP-EXP430FR5969.
If you want to buy the MSP-EXP430FR5969 kit, Id suggest you consider either direct from TI ($24.00) or from Newark ($24.05). Octopart gives a good look at the price spread and availability of the kit, with costs ranging from TIs $24 up to more than $39 from Arrow. The 43oh post above shows one way manufacturers entice hardware developers to buy newly released components. For $5 extra ($29 for the kit instead of $24), when you ordered the MSP-EXP430FR5969 kit from TI when it first came out, you got both the kit and a "LS013B4DN04
SHARP Memory LCD display...1.35?...96×96 pixels wide...booster PCB has touch capability, with touch strips on either side of the LCD" which retailed for $18. I dont know if $5 for that LCD is a better deal than the small LCD Ed Smith had at the Humboldt Microcontrollers Group meeting last week, but the touch strips would have made it an interesting component with which to experiment. Element14 also has a road kit for the board which includes the same LCD.

The other part of this post was going to be on an ideal use case for the MSP430FR5969 MCUs FRAM. However, I wrote more about the TI development kit than I planned on, and Im being mindful of feedback I got that said (at least some of) my posts were too long. So for people interested in reading about that use case right away, heres a link to the article about the FRAM-MCU application I mentioned at the start of this post. Ill discuss that use case in tomorrows post, and maybe have a couple other examples of good applications for an MCU that doesnt pull much amperage and has FRAM. If you read the FRAM-MCU application article, send me your comments and questions regarding that article -- arcatabob (at) gmail {dott}com. Thanks!

**********
Read More..

Senin, 02 Mei 2016

AND SO THE POWER THAT IS AQUAPONICS JUST KEEPS GROWING

 
Remember on Monday I wrote about both children and the More Mature members of our societies. Well I left out the middles. and the earlies. Say from 25 through to 50 years young. So what do I have to say about them. Plenty Brother..

For a start most people in this group are busy. They are busy from where I sit because to me, they look busy . They have lots to do, places to be, NOW. Yeah NOW is the priority in their lives because they are full of busy.

So how does a busy person have time to slow down to garden. Well! Its easy. Aquaponics....

Once an aquaponics setup has cycled and settled in, you dont have to spend hardly any time with it. Apart from selecting what we want for dinner, the only time I spend on our personal A/P unit is about 10 minutes per day and all I do is act like some commander surveying his troops. I walk around checking water levels to see if a bit of extra water is needed then I give the fish a bit of a feed, have a stroll through the grow beds checking that all is OK give the tomato plants a flick if its a Monday, (Yes Monday for me is flick day for the Tommys. Thats to spread the pollen in the air so fertilisation takes place. Just like you flick your sons ear if he needs it) Then Ill have a look through the plants for any bugs that may have found a way through the greenhouse shadecloth. There it is. A bit over an hour per week.

The only variation to that is a few seconds to adjust water flows if needed and once a week really study the fish, looking for signs of illness or stress and dealing with it as needed.

So that leaves plenty of time to go do "Busy" Plus youve provided a significant proportion of yours or your families food needs and the rest of the street as well if you are inclined that way.

Meanwhile we need to look for some new information......

                                               ...oooOooo...

The Twin Killers in Aquaponics – Dr Wilson Lennard
Dr Wilson Lennard is an Australian scientist with a PhD in Applied Biology. He has studied and installed commercial aquaponics systems around the world. In this video clip, he turns his attention to the future of aquaponics and the threats that can set it back many years.
This was filmed at one of my Aquaponics workshops in Brisbane Australia.

                                               ...oooOooo...

Next we have a Hydroponics web site talking about...Of all things A/P
In this set-up we are using the waste from live fish to feed our veggies. In turn, the hydroton (clay balls) used as a plant medium and the plants roots filter the waste and add oxygen back into the water for the live fish to breath.

                                               ...oooOooo...

Havent been here before
Ive created a new page called Aquaponics Extras to hold a few Special Topics regarding Aquaponics and ill start off with the Duckweed topic. Duckweed is an easy, cheap and abundant food source for fish. Its very high in protein (~40%) and could clean off waste water as well.

                                               ...oooOooo...

Now from the SQUIDOO Website:

Grow plants on unfertile land with aquaponics

Many people of all ages share the passion of gardening and growing fruit and vegetables. These people have the passion to see a tiny seed they have planted to reach maturity passing different stages and finally would like to taste the fruit and veggies they have waited for weeks and months sometimes.

                                               ...oooOooo...

Next up one of the guys on FaceBook:
The FaceBook Site
small scale commercial auqaponics, austin aquaponics, hannaleigh farm, Rob Nash, gravel beds, S & S aqua farm design, Speraneo proof of concept.The Video

                                               ...oooOooo...

If youre in or near Sydney Australia, this could interest you...
Event Description:
Every Sat, Transition Bondi and friends meet up to Learn, Dig, Play, Grow and socialize. With workshops from worm farming, to aquaponics to growing food the permaculture way.
This garden is open to the public and we invite new and curious folks to try some of the yummiest fruit and vegetables grown in Bondi! We also want to share the joy of watching natures systems work, the good times! 

                                               ...oooOooo...

Chatham hopes to break ground on new campus
The university has garnered $20 million to date in public and private support toward construction and program development at Eden Hall. Officials say a fundraising campaign will further support development. The ultimate dollar goal is still being decided.

The planing commission and board of supervisors in Richland will review the plan. It spans 20 years and includes about two dozen projects, from academic buildings and residences to a greenhouse, aquaponics facility and constructed wetlands.

                                               ...oooOooo...

Learn Aquaponics with Kijiji Grows


Come learn aquaponics. Explore nature and how it is harnessed through the components of a recirculating aquaponics system: aquaculture, filtration and hydroponics for numerous applications. 

                                               ...oooOooo...

Now heres a guy from Western Australia. Read and enjoy and remember IT WORKS for him: my vegie garden is kinda happening, its taking me a while to get used to the raised beds to be quite honest & the formal structure. our previous vegie garden was down the back of a chook pen on 5 acres that wasnt visible from the house, it sprawled, quite often became overgrown & i just chucked things in all over the place. being confined to the raised beds is challenging me & my meandering herb garden on the ground surrounding the beds is doing far better as i just chuck things in randomly.

                                               ...oooOooo...

What is Aquaponics? (Video)

by Chef Felisha on January 11, 2011
[Translate]
Aquaponics is a way of growing food that has a symbiotic relationship between the water, fish and vegetation. It is a wonderful alternative to other types of farming and when done well can add to the quality of our communities. 

                                               ...oooOooo...

OK I think everyone is going to enjoy this one...:
ITPWC is a phytoremediation device based on the Eco-Machine systems developed by Dr. John Todd* and research done by the ITPWC team on aquaponics systems. Built in the men’s bathroom on the ITP floor, our inspiration for this project was to create a system that made a positive impact on air quality while also improving the overall ambiance of the space.

                                               ...oooOooo...

Finally from E-Zine articles: 


Aquaponics media needs to be chemically inert, porous, stable and easily replenished. There are several aquaponic medias, like coconut husk, expanded clay, expanded slate, gravel, peat moss, perlite, rockwool, sand, and vermiculite. Each providing there own unique characteristics and benefits in different proportions.


I think you have some really good fodder to chew through here
Take Care
O Z Z I E
Read More..

Minggu, 01 Mei 2016

Unboxing And Updating A Texas Instruments MSP430FR5969 Ultra Low Power FRAM MCU

[Tonights post is by Ed Smith, a member of the Humboldt Microcontrollers Group]

I just received a Texas Instruments (TI) MSP430FR5969 LaunchPad! This is my unboxing post, Ill also cover updating the onboard programmers firmware for use with Energia.

Well kick things off with a few specs, or at least a quick product description. This is an unboxing not a review, after all.

The MSP430FR5969 MCU is aimed at extreme low power consumption, to the point where when it is operating at full power it consumes ~100µA/MHz. Thats quite low; at 16MHz its consuming a measly 1.6mA. In the various sleep modes the power draw is measured in handfuls of micro-amps, and in deep-sleep it even gets down to nano-amps.

The FR5969 LaunchPad takes that MCU and gives it a home, as well as a built in programming interface, breakout headers (with very nice labels, as well see later), buttons, LEDs, lots of jumpers, and a 0.1F supercap. Thats not µF, thats not mF, thats a tenth of a Farad, something that would have cost a tremendous amount of money a decade ago.

For bonus points, Energia already supports this platform.

The box is a simple affair, nothing especially flashy other than the rocket logos. Even those arent flashy per se, not compared to modern marketing anyway. Its a sturdy box, I approve.


Inside the box we find, not surprisingly, an anti-static bag with a LaunchPad in it! There actually is a surprise in here, Ill focus on it later.

This is the bottom of the board, in case you hadnt guessed.
Here we have the top side, there are hints of greatness here too.
The last thing in the box is a beefy mini-USB cable, to connect the LaunchPad to your computer for programming and/or power. Its very nice of TI to include this, and I appreciate it.


Out of the bag we get more detail, we can see the two user buttons plus reset button, a wide array of jumpers for controlling how much of the MCU core is connected to the debug/USB/power side of the board, as well as the supercap and two user addressable LEDs. Note the amount of text near the headers!
On the bottom there are two things I really, really like. One is the amount of pin information printed near the headers, Ill zoom in on it in a bit. The other is the plastic standoffs. This is something lacking in the vast majority of dev boards out there.
The board sits nicely on the standoffs and bottom headers, no worries about short circuits to metal tables no MCU tipping over when you try to plug something in. Its a small thing, but I appreciate it.
The silkscreen on both sides of the board is very informative, it gives you plenty of options for charging or not charging the supercap, using or not using the supercap, current monitoring, voltage monitoring, USB power or external power, etc. It also has significantly more pin information next to the headers than one usually sees. Not only the port numbers, which is standard, but also designations as to which pins do what. Serial TX and RX are marked on most boards, MOSI/MISO/SCK(SCLK) for SPI and SCL+/SDA+ for i2c are not usually marked, and they are here. This cuts down on the amount of time needed looking at datasheets and pinout diagrams substantially. I dearly hope that other companies will follow TIs lead here; they seem to be thinking about the end user.

All is not roses with the FR5969 LaunchPad however. Maybe it is roses, and were getting to the thorns now. In any event, there are two revisions of this MCU. The first revision to come out, and the new Energy Trace revision. Energy Trace adds a solid set of features to check where the energy is going, but it also requires a newer firmware version for the on board programmer. Unfortunately for some reason or another it doesnt seem to have made it on to the first round of Energy Trace boards! On the plus side, updating the firmware is fairly easy.

Updating the MSP430FR5969 EZ-FET Firmware via Energia

This guide assumes youre going to be using Energia to do your programming, or at least your firmware updating. Code Composer Studio also ships with an updater I believe, and you can download a standalone command line updater as well.

The first step is to open Energia and find the Update programmer menu. Its under the Tools menu and is not hard to find.

You will need to run this a few times, as there is a bug in the update script somewhere that times out after updating one device, and there are three devices on this board that need updating.

For the moment, run it until you start getting errors. I was able to update two out of three devices without any further effort.

Once you start getting errors you will need to close Energia and download the TI MSP430 Flasher utility, the command line program I mentioned above, you can find it here:
 MSP430 Flasher Link


Once you have downloaded and installed it, you need to open two folders. One is the MSP430Flasher install directory (click the pictures to the right for a larger size), the other is the mspdebug directory inside the Energia install directory. The pictures to the right show the paths on my computer.


Once you find the two directories you want to copy HIL.dll and MSP430.dll from MSP430Flasher into Energias mspdebug directory. Backing up Energias copies of those two files isnt a bad idea, I created a directory called "OEM" and moved the originals into it, then copied the new HIL and MSP430 dlls.


Once you have copied those two files, re-open Energia (if you didnt close it before, close it and re-open it) and run Update Programmer again. Instead of throwing errors it should happily update the remaining piece of firmware. If you feel like being sure, run it again and make sure its happy that time too.

Presto! Your MSP430FR5969 LaunchPad is now ready to use, enjoy!

- Ed Smith

**********
Read More..

Sabtu, 30 April 2016

Arc Controller Motor Shield More Power!!

The August 21 article "Arduino Motor Shield, Arc-Controller Launched By Arc Robotics" gave me a good reason to do a little research on microcontroller (MCU) motor control and motor shields.
Arc-Controller motor shield

The article covers the Arc-Controller, a new high capacity motor shield that has a Kickstarter campaign in progress, telling us:
"Maker, developers and hobbyists that enjoy building Arduino platform based projects might be interested in a new Arduino Motor Shield called the Arc controller which has been created by Arc Robotics...“There have been a lot of amazing projects come out of the Maker revolution, however, many are limited by the capability of their motor controller. We want to change that. The Arc-Controller is a bridge to bring high Amp motor control to your projects, up to 43 amps with a heat sink. It is capable of variable speed and direction control over a single Stepper Motor or two DC motors, because when do you only need one motor. The Arc-Controller is compatible with about any Arduino, or other micro controller such as Raspberry Pi. It runs an ATMega328, and is user programmable via the Arduino IDE."
The Kickstarter campaign still has 36 days to go, but it has gotten off to a very slow start, with only $927 pledged of the $41,500 funding goal. According to the Arc-Controller Kickstarter page,
"The Arc-Controller built around two H-Bridges. Each one can supply 43 amps of continuous current, with a properly mounted heat shield. The dual H-Bridges run separately, controlling two high-end DC Motors or as one controlling a single stepper motor. Built into the H-Bridges are current and temperature fail-safes.  If they begin to get too hot, or if they exceed the maximum current levels, current limiting will take affect. They will automatically shut down until they cool off, or until conditions are safe to operate. We also have included a reverse polarity protection...There is an integrated circuit on board that gives a current reading from the H-Brides to see how much current each individual motor is using. This gives you the option to write your sketches to react under certain loads, detect shorts and over heating states...We are creating a simple library that can be used to easily send commands to the Arc Controller. These commands can configure the Arc Controller to run a stepper motor, drive two brushed DC motors, and even an integrated an XY thumb stick “Arcade Drive”. The interface library will take input from you and transmit it to any number of connected Arc Controllers...We have had lots of success with tank style robots to the point that we made it run on two wheels until you want it to act like a tank. then it will lay down and drive like a tank. We have many theoretical uses, that we are eager to try such as: home made Segways, drive-by-wire go-karts, RC lawn mowers..."
There are a fair number of existing motor controllers for Arduinos if the Arc-Controller is overkill
for your needs. Here is a sampling of whats available for Arduino:
Adafruit motor shield V2
  1. Adafruit Motor Shield V2 for Arduino -- $19.95 -- "We kept the ability to drive up to 4 DC motors or 2 stepper motors, but added many improvements...Instead of a L293D darlington driver, we now have the TB6612 MOSFET driver: with 1.2A per channel and 3A peak current capability. It also has much lower voltage drops across the motor so you get more torque out of your batteries...Instead of using a latch and the Arduinos PWM pins, we have a fully-dedicated PWM driver chip onboard. This chip handles all the motor and speed controls over I2C...5 address-select pins means up to 32 stackable shields: thats 64 steppers or 128 DC motors!"
  2. Pololu Dual MC33926 Motor Driver Shield for Arduino -- $29.95 -- "This shield makes it easy to control two brushed DC motors with your Arduino or Arduino-compatible board. Its dual MC33926 motor drivers operate from 5 to 28 V and can deliver a continuous 3 A per motor. These great drivers also offer current-sense feedback and accept ultrasonic PWM frequencies for quieter operation."
  3. Ardumoto - Motor Driver Shield -- $24.95 -- "This is a motor shield for Arduino that will
    Ardumotor from SparkFun
    control two DC motors. Based on the L298 H-bridge, the Ardumoto can drive up to 2 amps per channel. The board takes its power from the same Vin line as the Arduino board, includes blue and yellow LEDs to indicate active direction, and all driver lines are diode protected from back EMF
    ."
  4. Monster Moto Shield -- $69.95 -- "This is essentially a ramped up version of our Ardumoto motor driver shield. For this monster shield we’ve replaced the L298 H-bridge with a pair of VNH2SP30 full-bridge motor drivers. We’ve also beefed up the support circuitry so this board is capable of driving a pair of high-current motors!"
  5. EasyDriver Stepper Motor Driver -- $14.95 -- "The EasyDriver is a simple to use stepper motor driver, compatible with anything that can output a digital 0 to 5V pulse (or 0 to 3.3V pulse if you solder SJ2 closed on the EasyDriver). EasyDriver requires a 7V to 20V supply to power the motor and can power any voltage of stepper motor."
If you use large motors or lots of motors on your MCU projects and could really use the Arc-Controller, you may want to head over to their Kickstarter page and support their campaign. If you know of other motor shields that do pretty much the same thing, send an email to arcatabob (at) gmail {dott} com and let me know what you use or recommend, and Ill update the post with that info.

**********
Read More..

Selasa, 12 April 2016

Democratize Electronics From Idea To Circuit In Minutes

Squink is a recently launched Kickstarter project which is described as "the personal electronic circuit factory."

It seems like Squink could be of high interest to Humboldt people who frequently prototype new electronics designs, especially ones involving microcontrollers (MCUs). I personally wouldnt need a Squink of my own, but Id love to have access to one. If this Kickstarter campaign hits its funding target of $100,000, every makerspace and hackerspace is going to want a Squink. However, the project appears to be off to a slow start, so I hope the funding pace picks up over the next week or two.

According to the BotFactory website,
"Using inkjet technology, Squink prints conductive ink on a surface to create the traces of the circuit. You can print GERBER RS-274X files or upload PNG, JPG or BMP files...Squink uses the soldermask file generated by your CAD tool to place dots of conductive glue in every connection point where a part is to be connected...Aimed at assembling SMD based circuits, Squink uses vacuum to pick components from a tray. Then it aligns them using computer vision, rotates them according to the "Centroid and Rotation" file created in your CAD tool and places them accurately."
Squink is a simplified printed circuit board (PCB) fab and assembly prototyping tool. However, the TechCrunch post says that the Squink founders arent trying to replace the PCB batch fab companies like OSH Park, or the straightforward PCB fab companies.
"They don’t want Squink to replace the current process of sending projects to manufacturers to build but want it to be a tool for people to test out their ideas immediately, without having to create a delay in the creative process. “We really want to be a stepping stone — try it out really quickly and once you’re ready, then you crank out about 100 boards from a manufacturer..."
The BotFactory blog gives a little more background on the genesis of the Squink concept.
"We were both attending a challenging class on Bio-electronics...you had one semester to design, assemble, and test a basic EEG system (also called a brainwave reader; our version was capable of measuring attention and winking). While the design of the EEG probes on paper and then on a CAD program took a big part of the semester, what was later revealed as the most critical part was the circuit fabrication itself. Out of the 8 teams, only 1 managed to finish on time for the end of the semester. The reason was simply frustrating: it took PCB manufacturers around 7 to 10 days to fabricate and ship all the boards. If you had made even a single mistake in your design, you had to send your design for fabrication again, and you were sure to miss the deadline."
Although the implementation of the concept may seem a bit simplistic to PCB designers who are used to complicated circuits on multi-layer boards with very narrow traces, I expect people using the Squink and similar personal electronic circuit factories to come up with novel and interesting applications over the next few years. I have no doubt that enterprising middle school students who get their hands on a Squink will make money printing off custom circuits for their friends and neighbors. And those same middle school students will later develop a new printing technique, or a new electronic circuit substrate, or some other personal electronic circuit factory concept that no college student or electrical engineer has yet thought of...

What MCU circuit would you print tonight if you had a Squink to play with?

**********
Read More..

Sabtu, 26 Maret 2016

MCU Music Home Multi zone Arduino Audio

Members of the Humboldt Microcontrollers Group have a more than average interest in microcontrollers (MCUs) and music, e.g. the Humboldt Laser Harp (HLH) and Raspberry Pi music systems.

Weve got the proof-of-concept HLH working, but we need to take the next step in expanding the musical capabilities of the HLH. After I talk with Ed, Nick and others in the MCU group about how to most cost effectively improve the music from the harp, Ill write a post about electronic music component options. In the meantime, heres an MCU music topic I read about in an August 2014 Atmel blog post.
Custom PCB fabbed by OSH Park

The Atmel post points to an Instructables titled "The Smartphone Operated House-Wide Audio System" that talks about a system that:
"...solves the seemingly ubiquitous problem of being able to listen to your music from anywhere in your house. Say goodbye to a separate iPod dock in each room! This instructable will show you step-by-step how to build a house wide, multi zone audio system which can be entirely controlled from your Smartphone or computer (really anything with a web browser) from anywhere in your house which you have a Wifi connection...its also expandable to however many zones you need...this system allows you to use speakers and amps of your choosing and at a fraction of the cost of a Sonos system. In this project we will be making use of an Arduino uno with an ethernet shield and a custom PCB which can be ordered from your favorite PCB manufacturer (I recommend OSH Park). The central component of the PCB is the PT2258 IC. This IC allows for volume control of 6 audio channels and communicates with the Arduino over the I2C bus."
Arduino with Ethernet shield and custom PCB with PT2258 IC
The Princeton Technology datasheet for the PT2258 IC shows the block diagram and pin configuration for this component. Reading over the Tutorialsto.com write-up about the IC will give you a general understanding of the component if you dont already know what it is.

Lepai LP-2020A+ amplifier
This MCU project is more complicated than some projects in other posts Ive written, but it will give you good experience in doing activities like ordering a custom PCB (printed circuit board), soldering components on the custom PCB, and hooking up your fabbed and assembled custom PCB with a 6-channel amp and power supply. The Instructables has a pretty good set of photos showing how to solder the components on the PCB, so dont worry about that step if you havent assembled many, or any, PCBs. The two amplifier options listed in the project write-up both look fun to work with; a Lepai LP-2020A+ for about $20 or a Parts Express AA-AB34181 for about $60.

The Instructables project author describes using the finished audio system this way:
Parts Express AA-AB34181 amplifier
"In order to maintain the idea of being able to control the system from a smartphone, I used a Chromecast with an HDMI audio extractor. This allows us to take the audio the Chromecast outputs and plug it into our PT2258 control board. Thus we can simply cast our favorite Pandora station or music from Google Play Music to the Chromecast and control the volume from our Arduino. Simply plug the Chromecast into a TV and set it up on your home network, then unplug it from the tv and plug it into the HDMI audio extractor. Using a RCA to 3.5mm cable, plug the HDMI audio extractor into the input of the PT2258 board...The system can be controlled by anything which has a web browser and is connected to your home network. All you have to do is type in the IP address of the arduino followed by "/?app" (i.e. 192.168.1.199/?app) and you will be brought to the control app for the system...The greatest limitation of this system is the fact that there is only one audio input for the entire system. That means you have to listen to the same song throughout the entire house."
This system costs about $300 to build, so I wont be putting one together any time soon, but the project gives a good overview of setting up a pretty versatile home audio system from scratch.

**********
Read More..